Hi everyone, in this blog post I’ll show you how you can set up a Raspberry Pi 2 from box to boot up in under 5 mins.
I bought myself a Raspberry Pi 2 the other week having done a lot of research on it, I picked up this Raspberry Pi 2 starter kit up from Amazon*
I made this video in which
- I unpack the whole thing
- Show you what’s included in the raspberry pi 2 pack
- How to assemble the kit
- How to install the software
- How to boot up the Raspberry Pi 2 for the first time
So let’s play the video
Raspberry Pi 2 set up – putting it all together
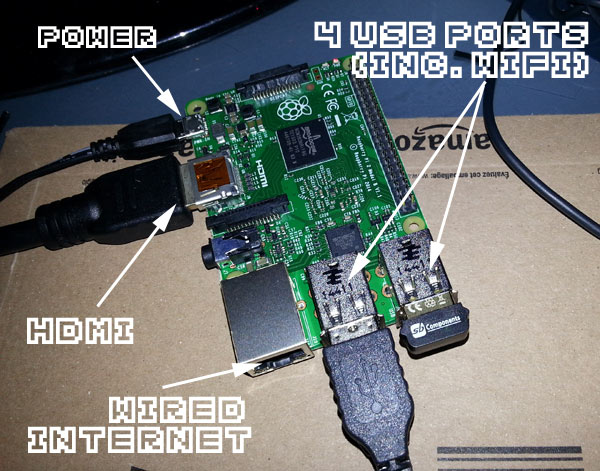
It’s a very cool set up, along the edge (left side in the above picture) you’ll find a HDMI cable to attach the Raspberry Pi 2 to your monitor or TV (you know you can quickly and easily turn any HD TV into a smart TV using a Rasperberry Pi 2 – imagine upgrading your existing HD TV to a smart TV for a fraction of the cost – and your smart TV can be much smarter than any of the prodicts in the shops).
Then at the top of the side (left side in the picture) is the power chord – as soon as it recieves power it turns itself on.
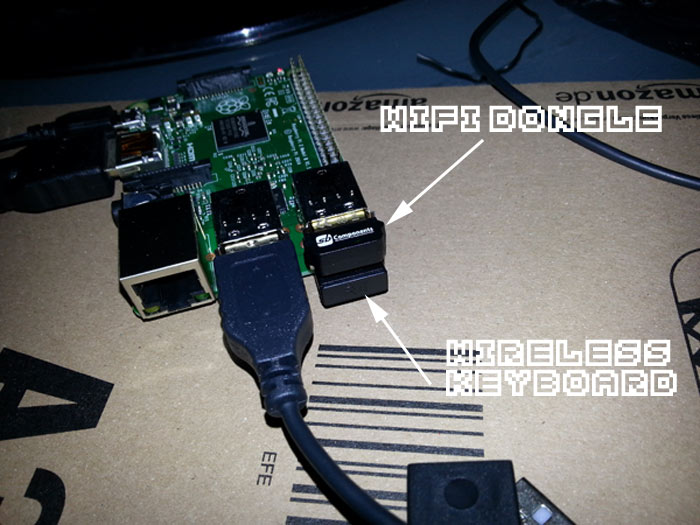
On the end of the board you have all your USB ports, there are four in all. If you buy the combined mouse and keyboard (see below) you use one of the slots of that, use another with your wifi dongle and that still leaves two spare.
There’s a wired internet port, but if you are using the wifi you won’t need to use this.
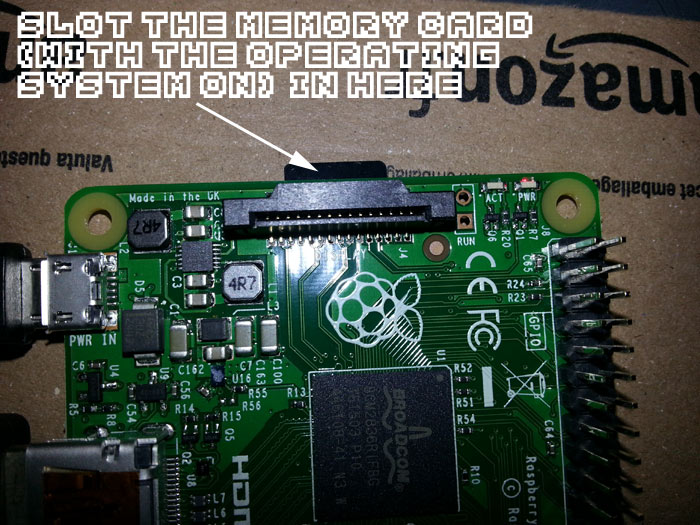
On the underside of the Raspberry Pi 2 is where you put the memory card, the one that came installed with Noobs (see 1 min 55 secs of the video at the top). It’s as simple as just slotting it in.
Here’s a closer look at that keyboard. When I bought the pack, I didn’t realise that the keyboard was going to be this small. A small box was delivered to my door and I immediately thought, ‘oh no they didn’t pack the keyboard!’, but I was really pleasantly surprised when I opened up and found this beauty inside.
On the right side of the keyboard is a touch sensitve mouse pad with left and right mouse clicking ability – I think this keyboard could pretty much work as a keyboard on any USB device – again if you use the Raspberry Pi 2 as an alternative to a smart TV then the keyboard essentially becomes a controller for your TV – now imagine any smart TV giving you the same flexibility that a Raspberry Pi 2 could.
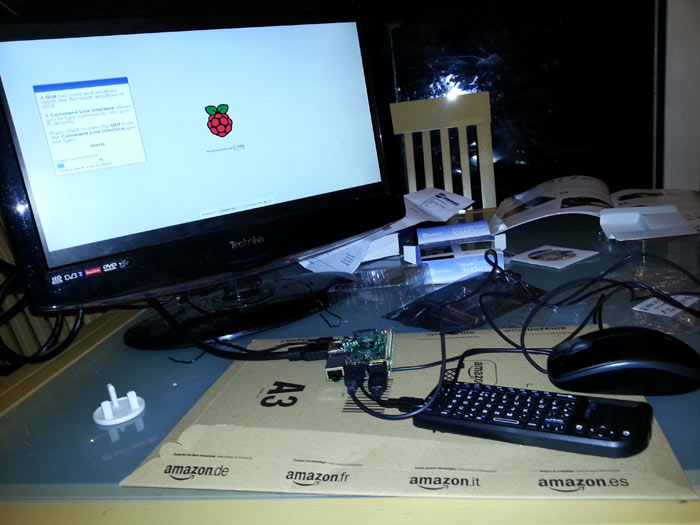
Here’s the whole set up, it took around half an hour to set up the whole thing, I’ve since tidied it up, but I wanted to get the whole thing set up and figured out so that the kids could just get on and play with it in the morning – them watching me faff around trying to install the operating system would probably have put them off straight away.
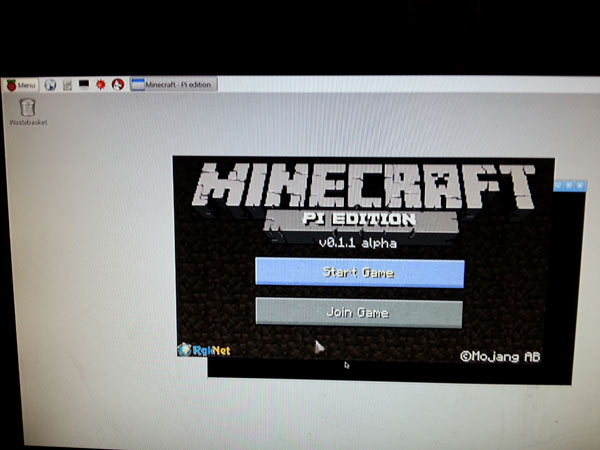
Something else that will win the kids over – the Raspberry Pi 2 Noobs edition comes pre-installed with Minecraft – I think that deserves a tutorial all of its own.
And now you ready to go – from box to running in under forty minutes.
I’ll start blogging more about some cool projects that I get up to over the next few weeks and months.
Where to get your own
This is a link* to the Rapsberry Pi complete starter kit that I featured in the video
I also bought this book* too, which helped me learn very quickly what I needed to in order to get up to speed so quickly.
Essentially the first third of the book will help you get set up, although I showed you in the video how you can do it – if you feel like you want more indepth explanations and a history of the Raspberry Pi then this is excellent for you. The other two thirds have some very cool projects that you could do with your child. And as the name suggests that it is written with kids in mind (but would still require a fair amount of input from you – but hey you get to be a kid again – which is very cool)
So tell me, if you have a Raspberry Pi 2, did you have a similar set up experience, did you find it just as easy or was it more difficult to set up. I was actually very impressed with the speed that I was able to set it all up at – the pack I bought was very comprehensively built. I guess the only thing that could have helped was having the operating system put on the board, rather than me having to install it – but I guess that probably would have inflated the price quite a lot (after all they’d have to pay someone to install it on the machine – which takes around half an hour). And also if it’s all done for you it really wouldn’t be as much fun, and the Pi would feel like just another consumer product, where as here you feel you have some ownership in the creation of your board.
I feel overall that this is a theme that runs through the Raspberry Pi culture that you are able to move away from the mainstream consumer cycle that seems now to be pervasive in the digital world – one of the advantages of moving to digital was that we could move away from the ubiquitous consumer brands – but they seem to follow us onto digital. For now (at least) the Raspberry Pi landscape seems void of these commercial aspects and is a real hot pot for independence and creativeness – absolutely perfect for young fertile minds afterall you all know my thoughts on the mind pollution on TV and the mainstream media (see my blog post on how much TV is dedicated to adverts here). If you’re interested then this set I think is quick and easy to set up.
want a #RaspberryPi for your kid(s)?
.
Watch my guide to get it set up in under 5 mins
.
-> http://t.co/zcdfm21sVB pic.twitter.com/fvm1y1Fu4R
— workingParent (@ParentWorking) April 26, 2015
* a quick word about the links, yes they are both done via the Amazon Affliates – as you know (or at least you should) I don’t and would never put anything on my blog that I didn’t think was worthwhile in you buying, firstly if I didn’t think it was any good I would spend so much time blogging about it. If anyone ever asked me (not that anyone has) to promote a product for them I would write an honest review of it, if I thought it was good I’d write a good review, if I thought it was rubbish I’d make that clear in my post. So why then would I put an affliate link in? Well if you don’t want to go through my link then feel free to go direct to Amazon and search for the product – but by clicking and buying through my link means I get a commision, the more I get (if any) will help me spend more time blogging, and as you know I blog only for you guys (seriously look through the blog and you’d see every single post is written to help parents).




 Thanks so much for your support - it's genuinely appreciated
Leave a Reply